11 Tips for Photographing Butterflies
Tom and I love to photograph “fluttering self-propelled Flowers” aka butterflies. Tom & I met through photography and we love all aspects of nature photography, and we spend much of our time like photographic nomads, experiencing photographic “zugunruhe” (the migratory restlessness which causes migrations). Both “zugunruhe” and “FOMO” (fear of missing out) inspire us to travel to places where the flowers blossom, insects fly, and birds flock.
Where to find Butterflies?
- Local parks
- Your Yard! Especially if you keep it pesticide free or better yet get your yard ‘wildlife habitat certified’.
- Zoos often have butterfly exhibits and encounters.
- Butterfly Conservancies
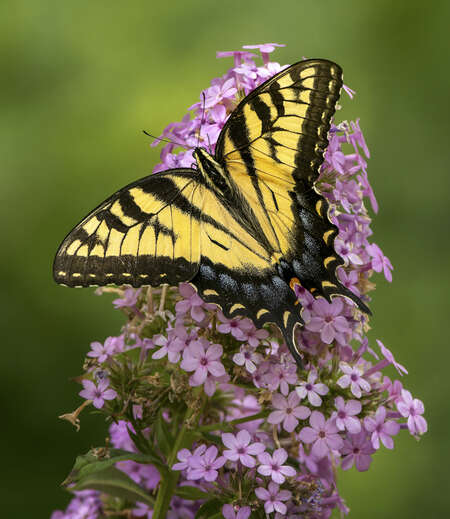
Choose A Pleasing Background
- Look for a non-distracting background, greens always works, but colors at opposite ends of the color wheel also make great backgrounds.
- If your flower is in a moveable planter perhaps move it to have a more pleasing background, or a background that is further way.
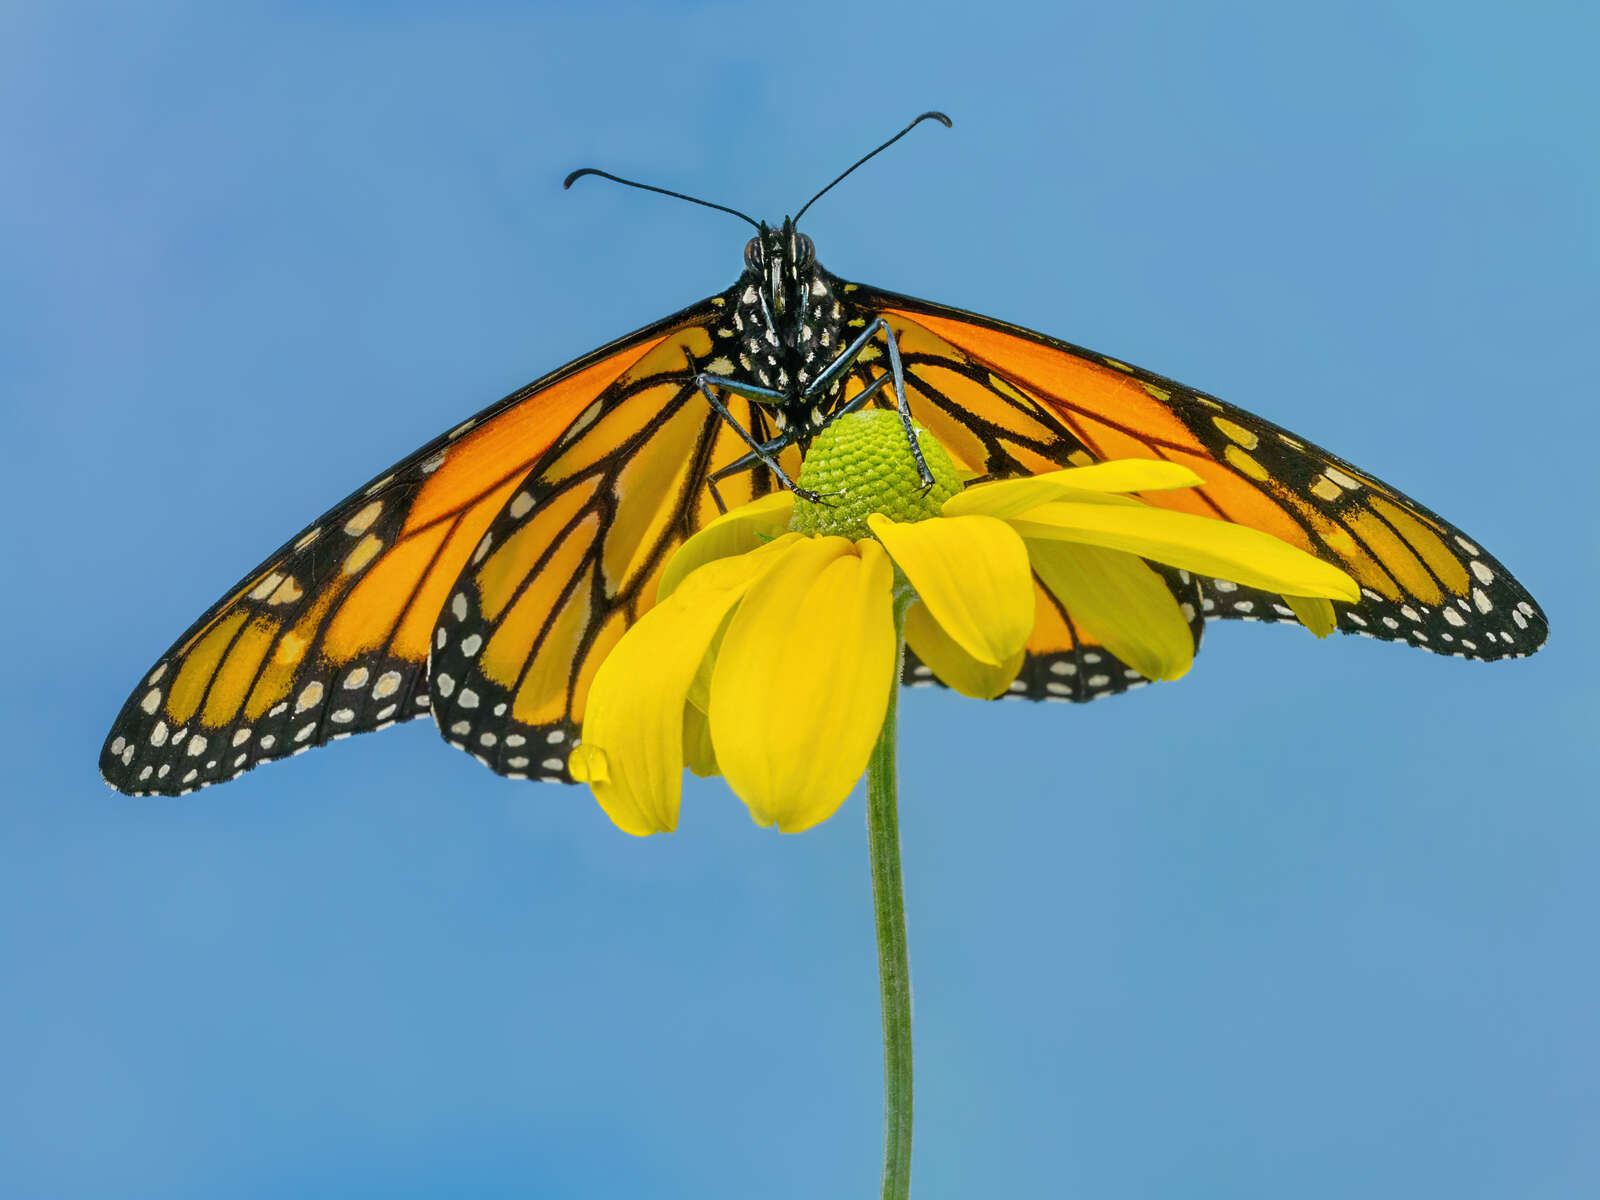
- The blue sky can make for a great background, and you can make use of the articulating LCD screen for easy composition.
- Even a white sky can provide good background and you can even create silhouette, again, can make use of the camera’s articulating LCD screen for an easy composition.
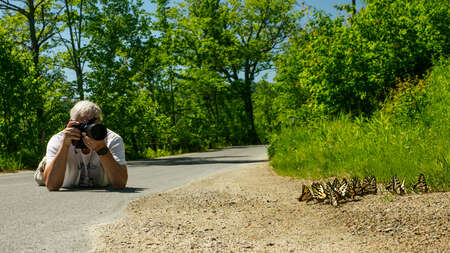
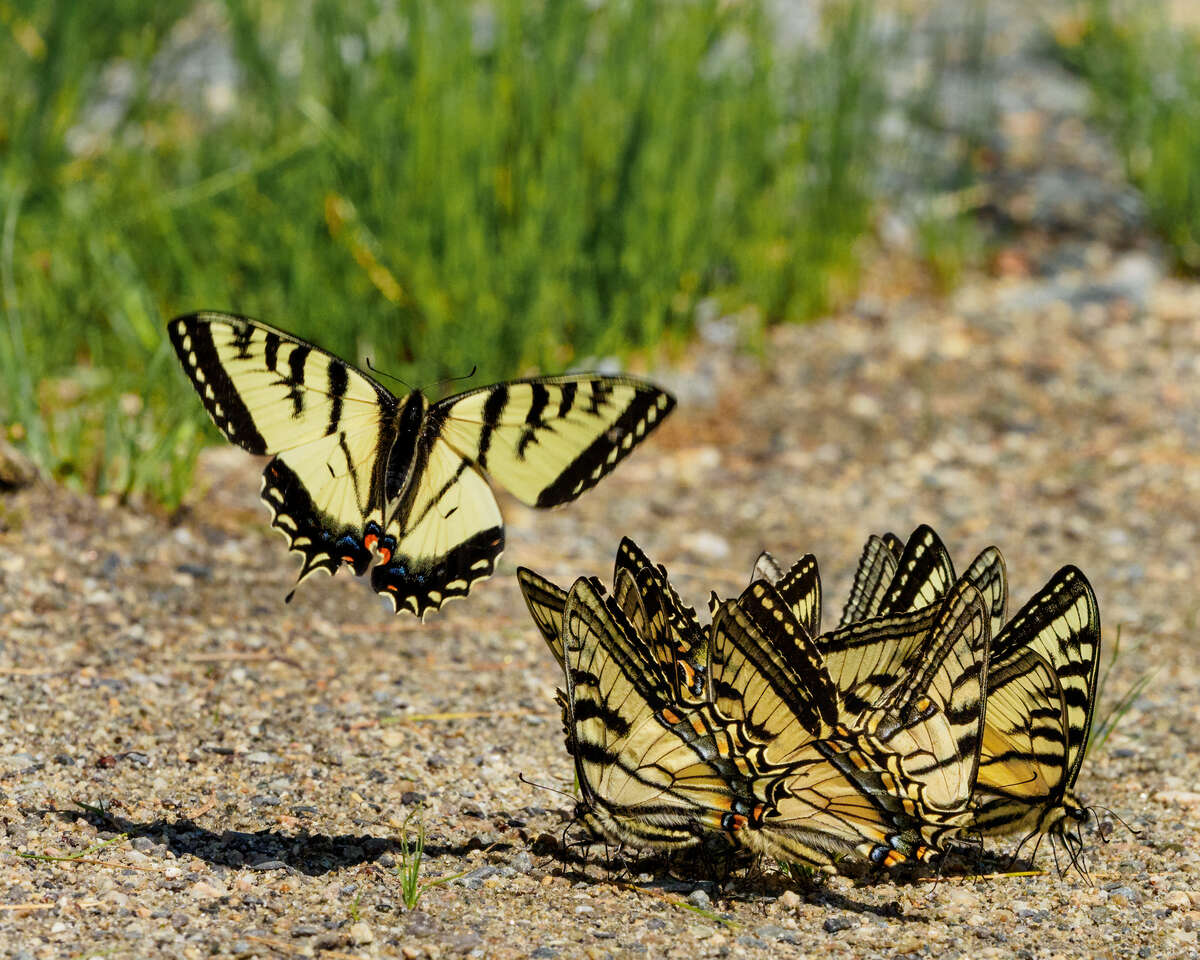
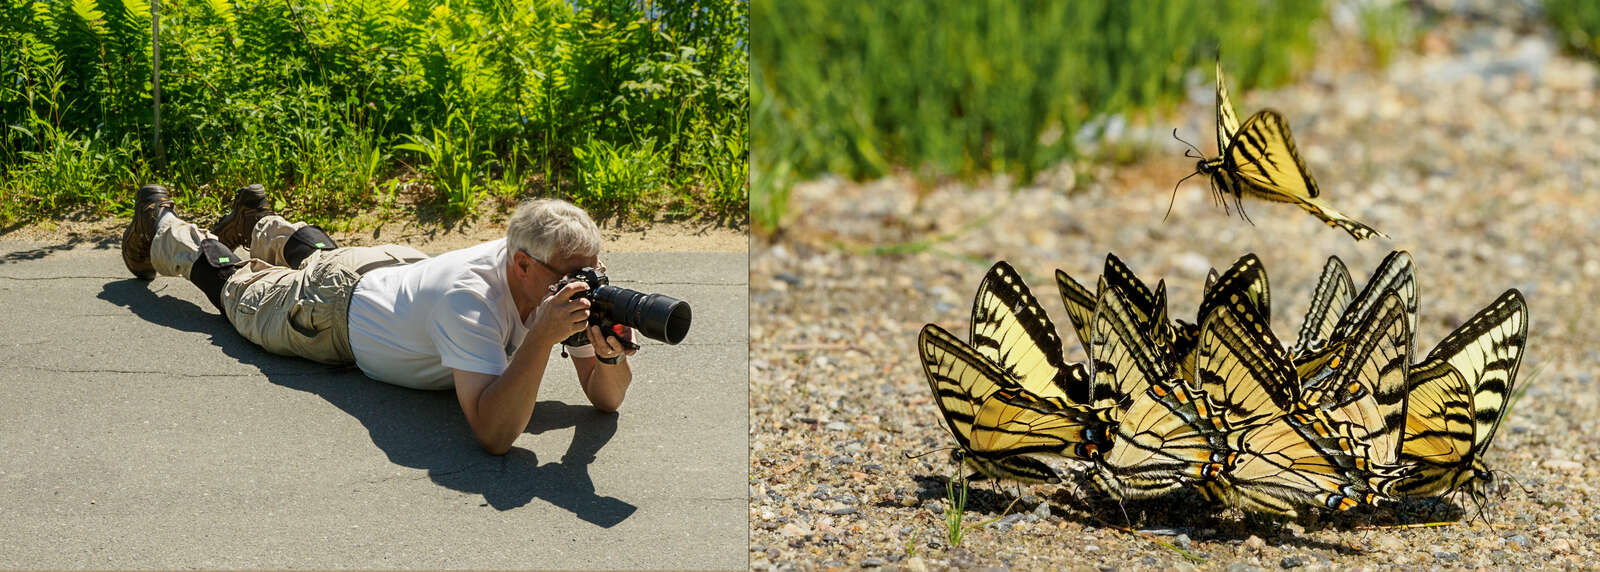
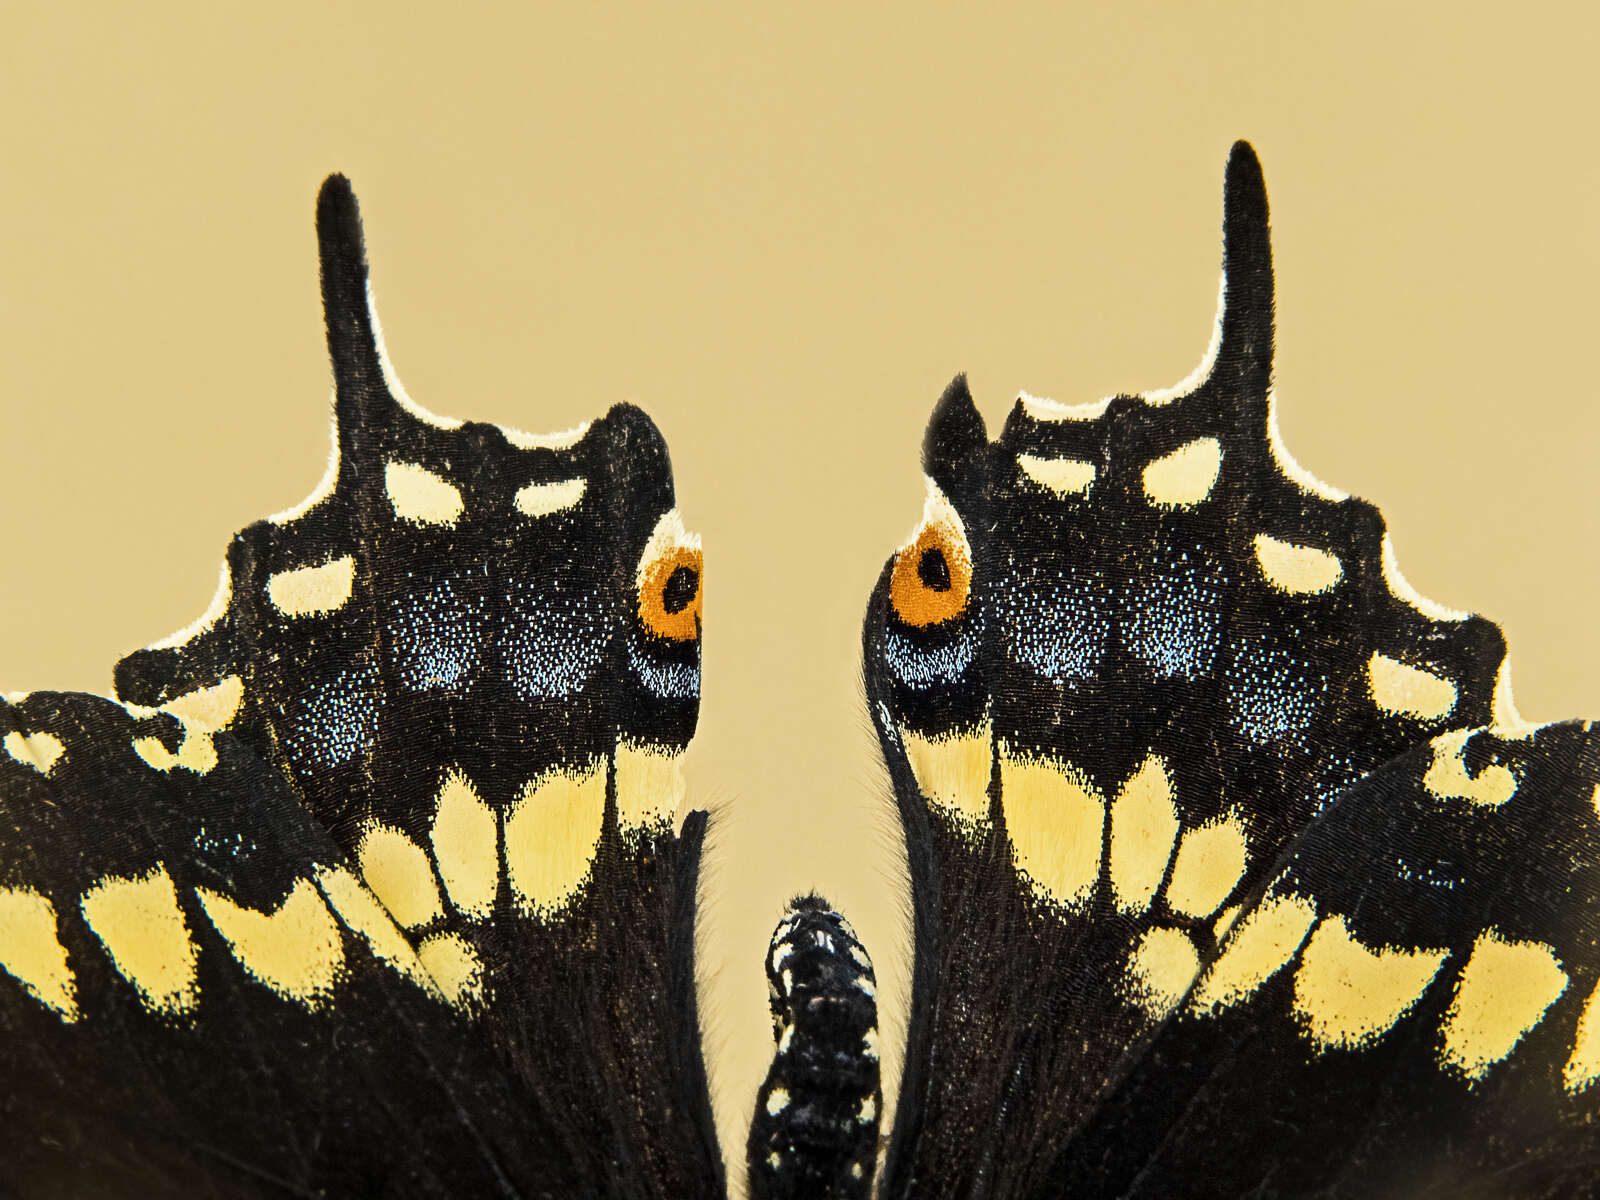
Get Eye Level
- Sometimes this can mean getting down on the ground, like Tom photographing these swallowtail butterflies getting salts from the road. Alternatively, rather than lying on the ground, you can achieve the same eye level composition by using your flip-out articulating LCD screen.
The Best Gear Is The Gear You Have With You
- Handholding is very appropriate when photographing butterflies, but if you are going to use a tripod, a focusing rail can be a big help, allowing you to move in small increments forward and back and left and right without moving your tripod.
- These are the four MAIN lenses that I used to photograph butterflies, moths, dragonflies and caterpillars, but in reality, I have photographed butterflies using many of the lenses in my camera bag, -- why? Because that is the lens I had with me for another subject and along fluttered by a butterfly.
- I have photographed butterflies using many different Olympus/OM SYSTEM cameras: Olympus OM-D E-M1 Mark II, Olympus OM-D E-M1 Mark III, Olympus OM-D E-M5 Mark II, Olympus OM-D E-M5 Mark III, Olympus OM-D E-M1X, OM SYSTEM OM-5 and the OM SYSTEM OM-1. For some subjects, such as birds or night photography the specific camera model with its specific specifications and or computational technologies can be very instrumental in obtaining a higher “keeper rate” but luckily butterflies require patience more than “technology” -- so the best camera for butterflies is likely the OM SYSTEM camera that you already own. I have photographed butterflies using many different Olympus/OM SYSTEM lenses.

Point Your Shadow Towards Your Subject
- Try to orient yourself so that the sun is to your back (think of your shadow as a sundial and you want your shadow pointing towards your subject), the same as you would do for bird photography. But it is also OK to sidelight if you have a better background on that sun angle, and backlighting, rim-lighting, and silhouettes can have impact for certain images too.
- Backlighting can allow you to highlight the translucent property of many butterfly wings.
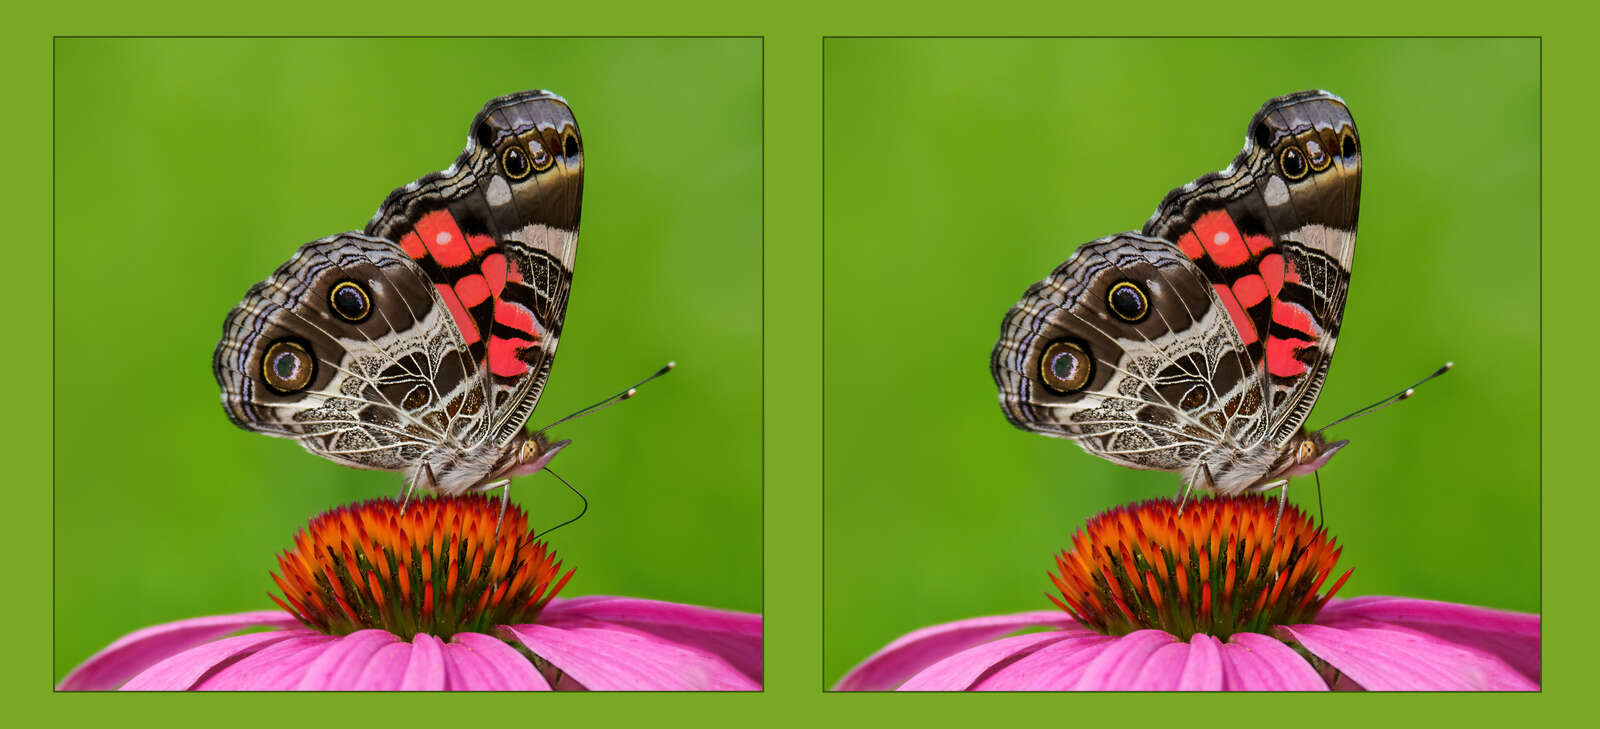
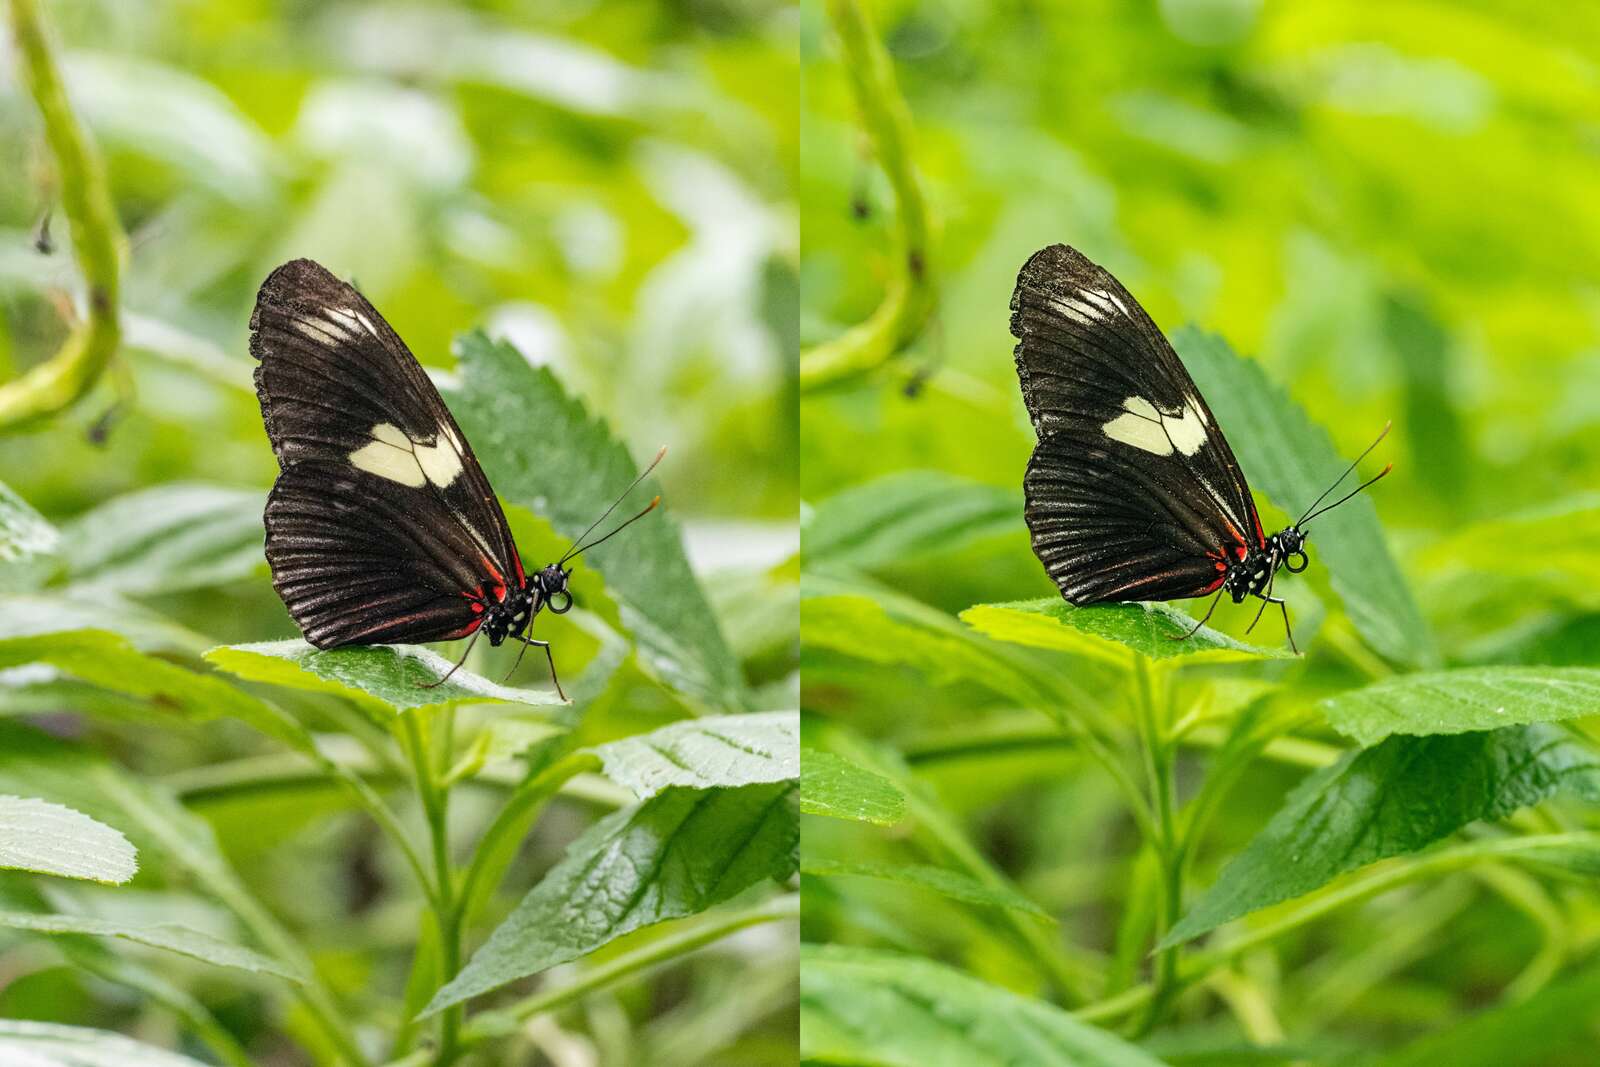
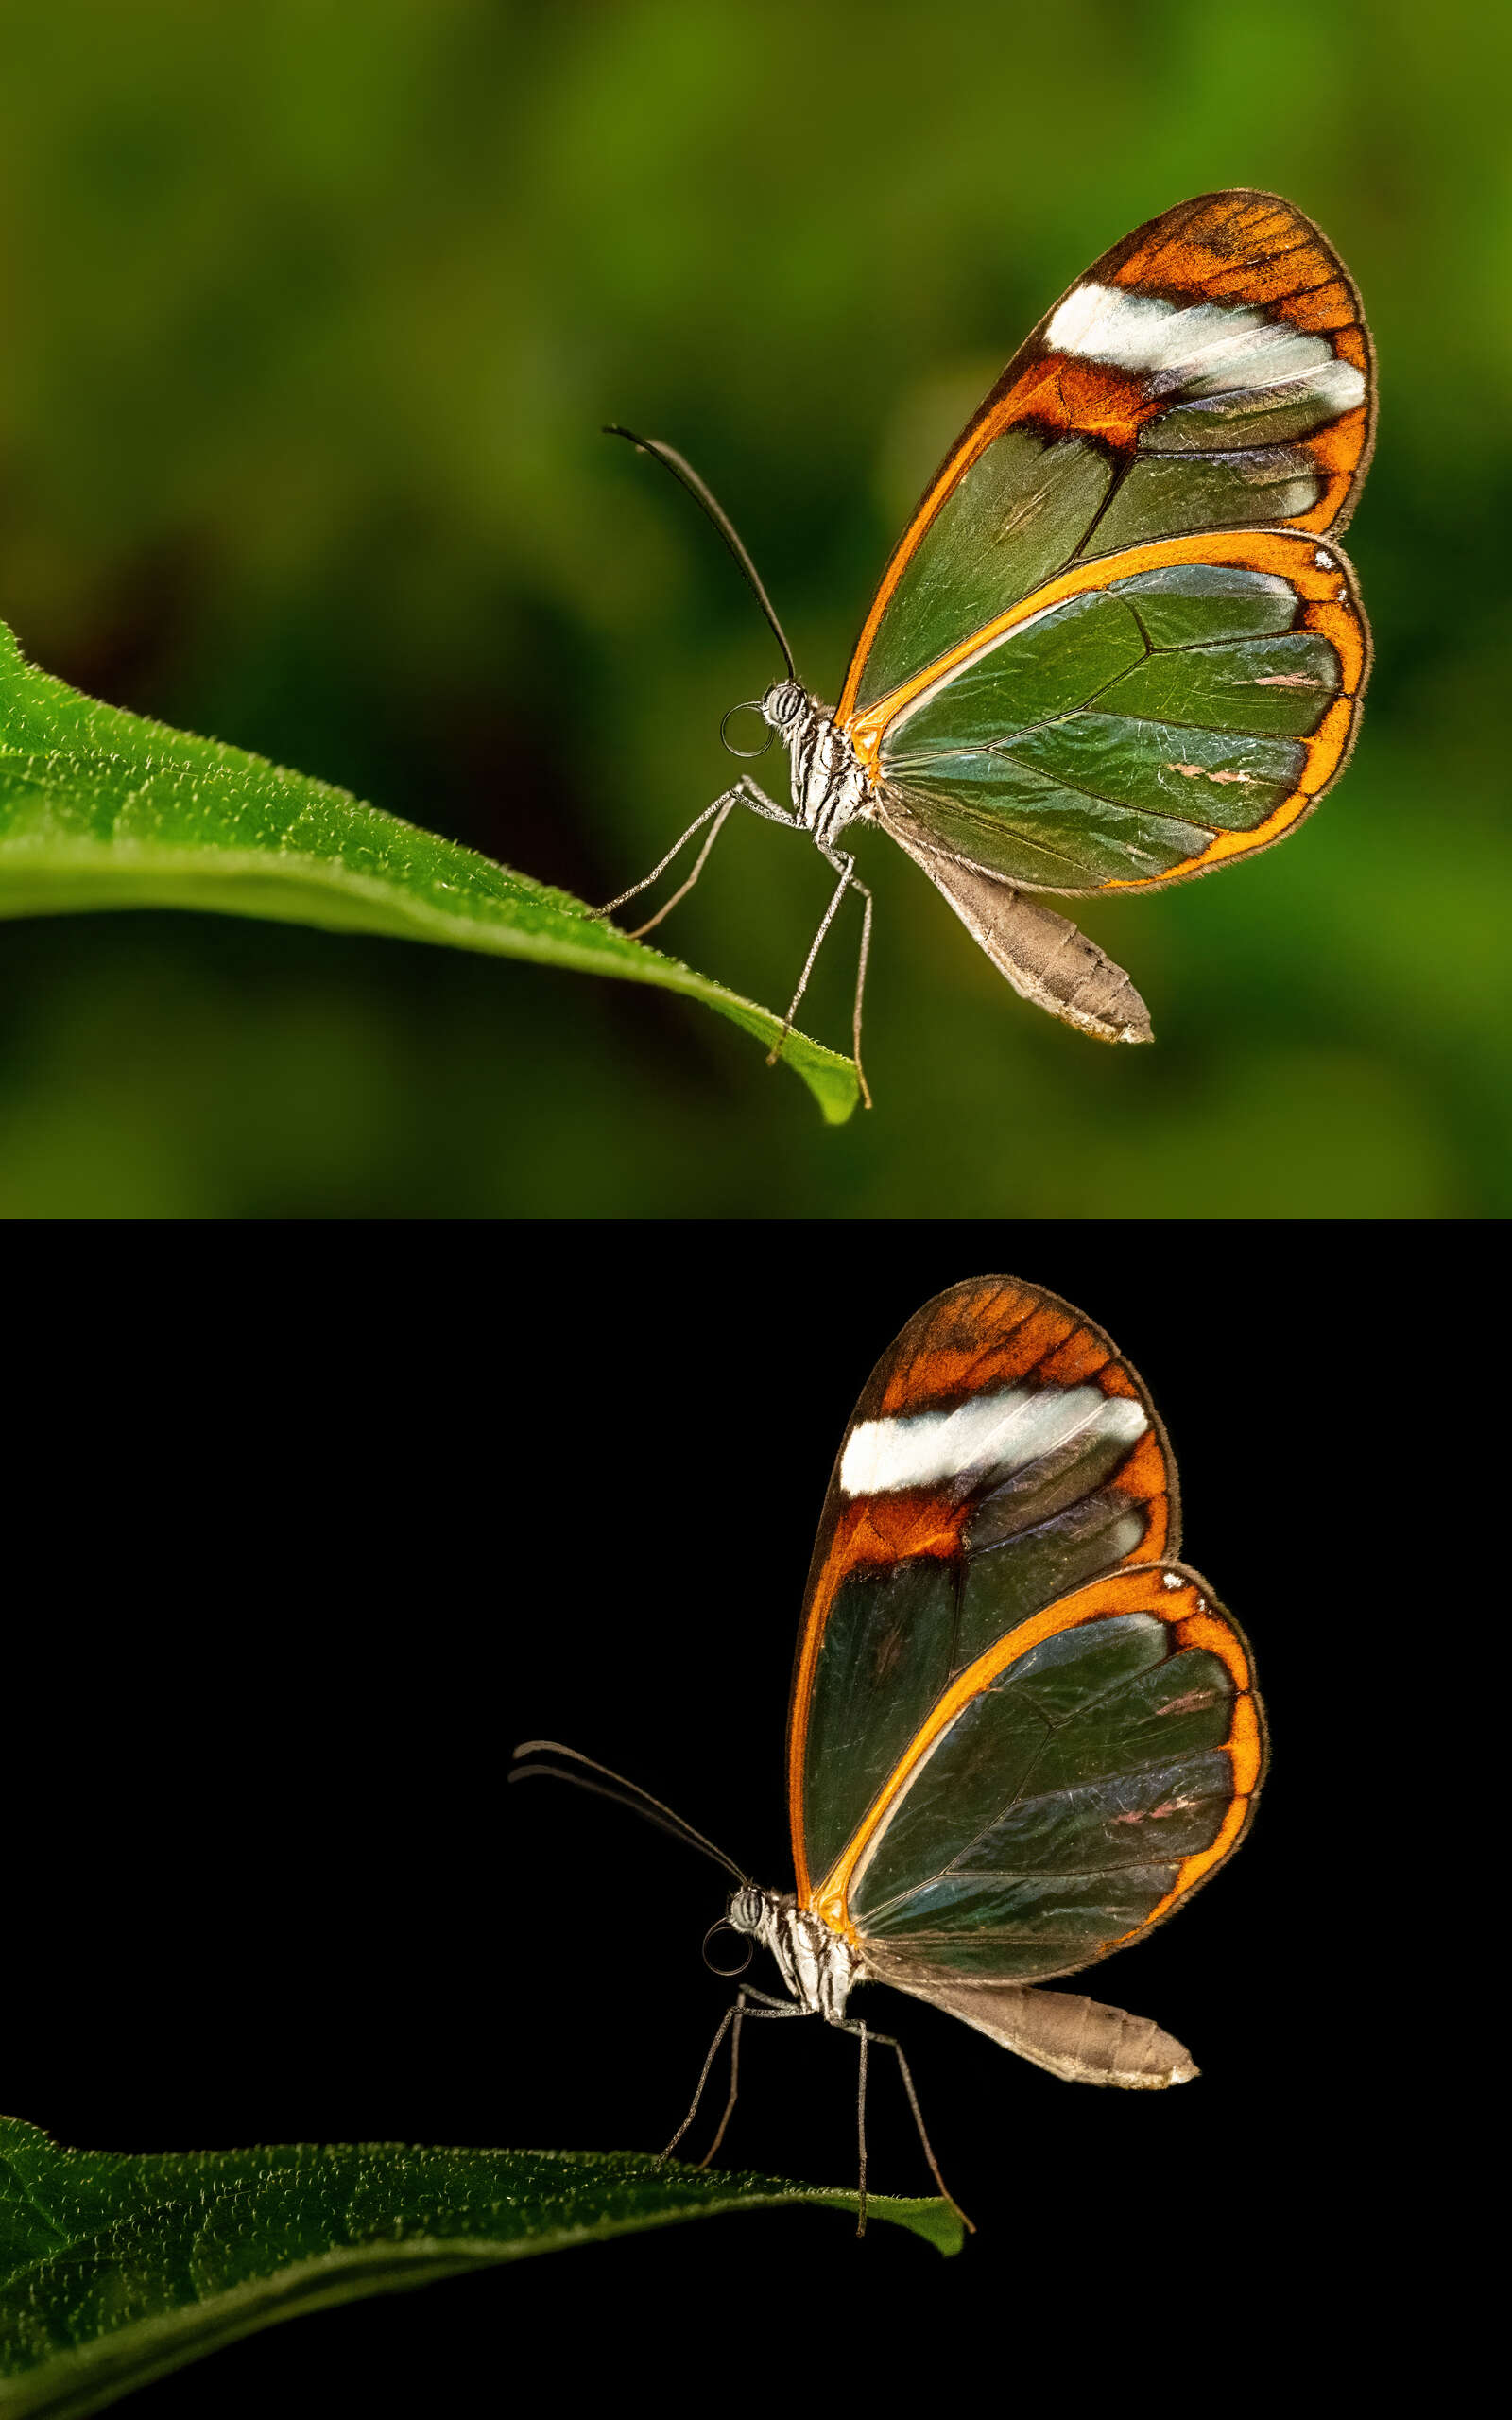
Watch And Learn Your Subject - Pays Off!
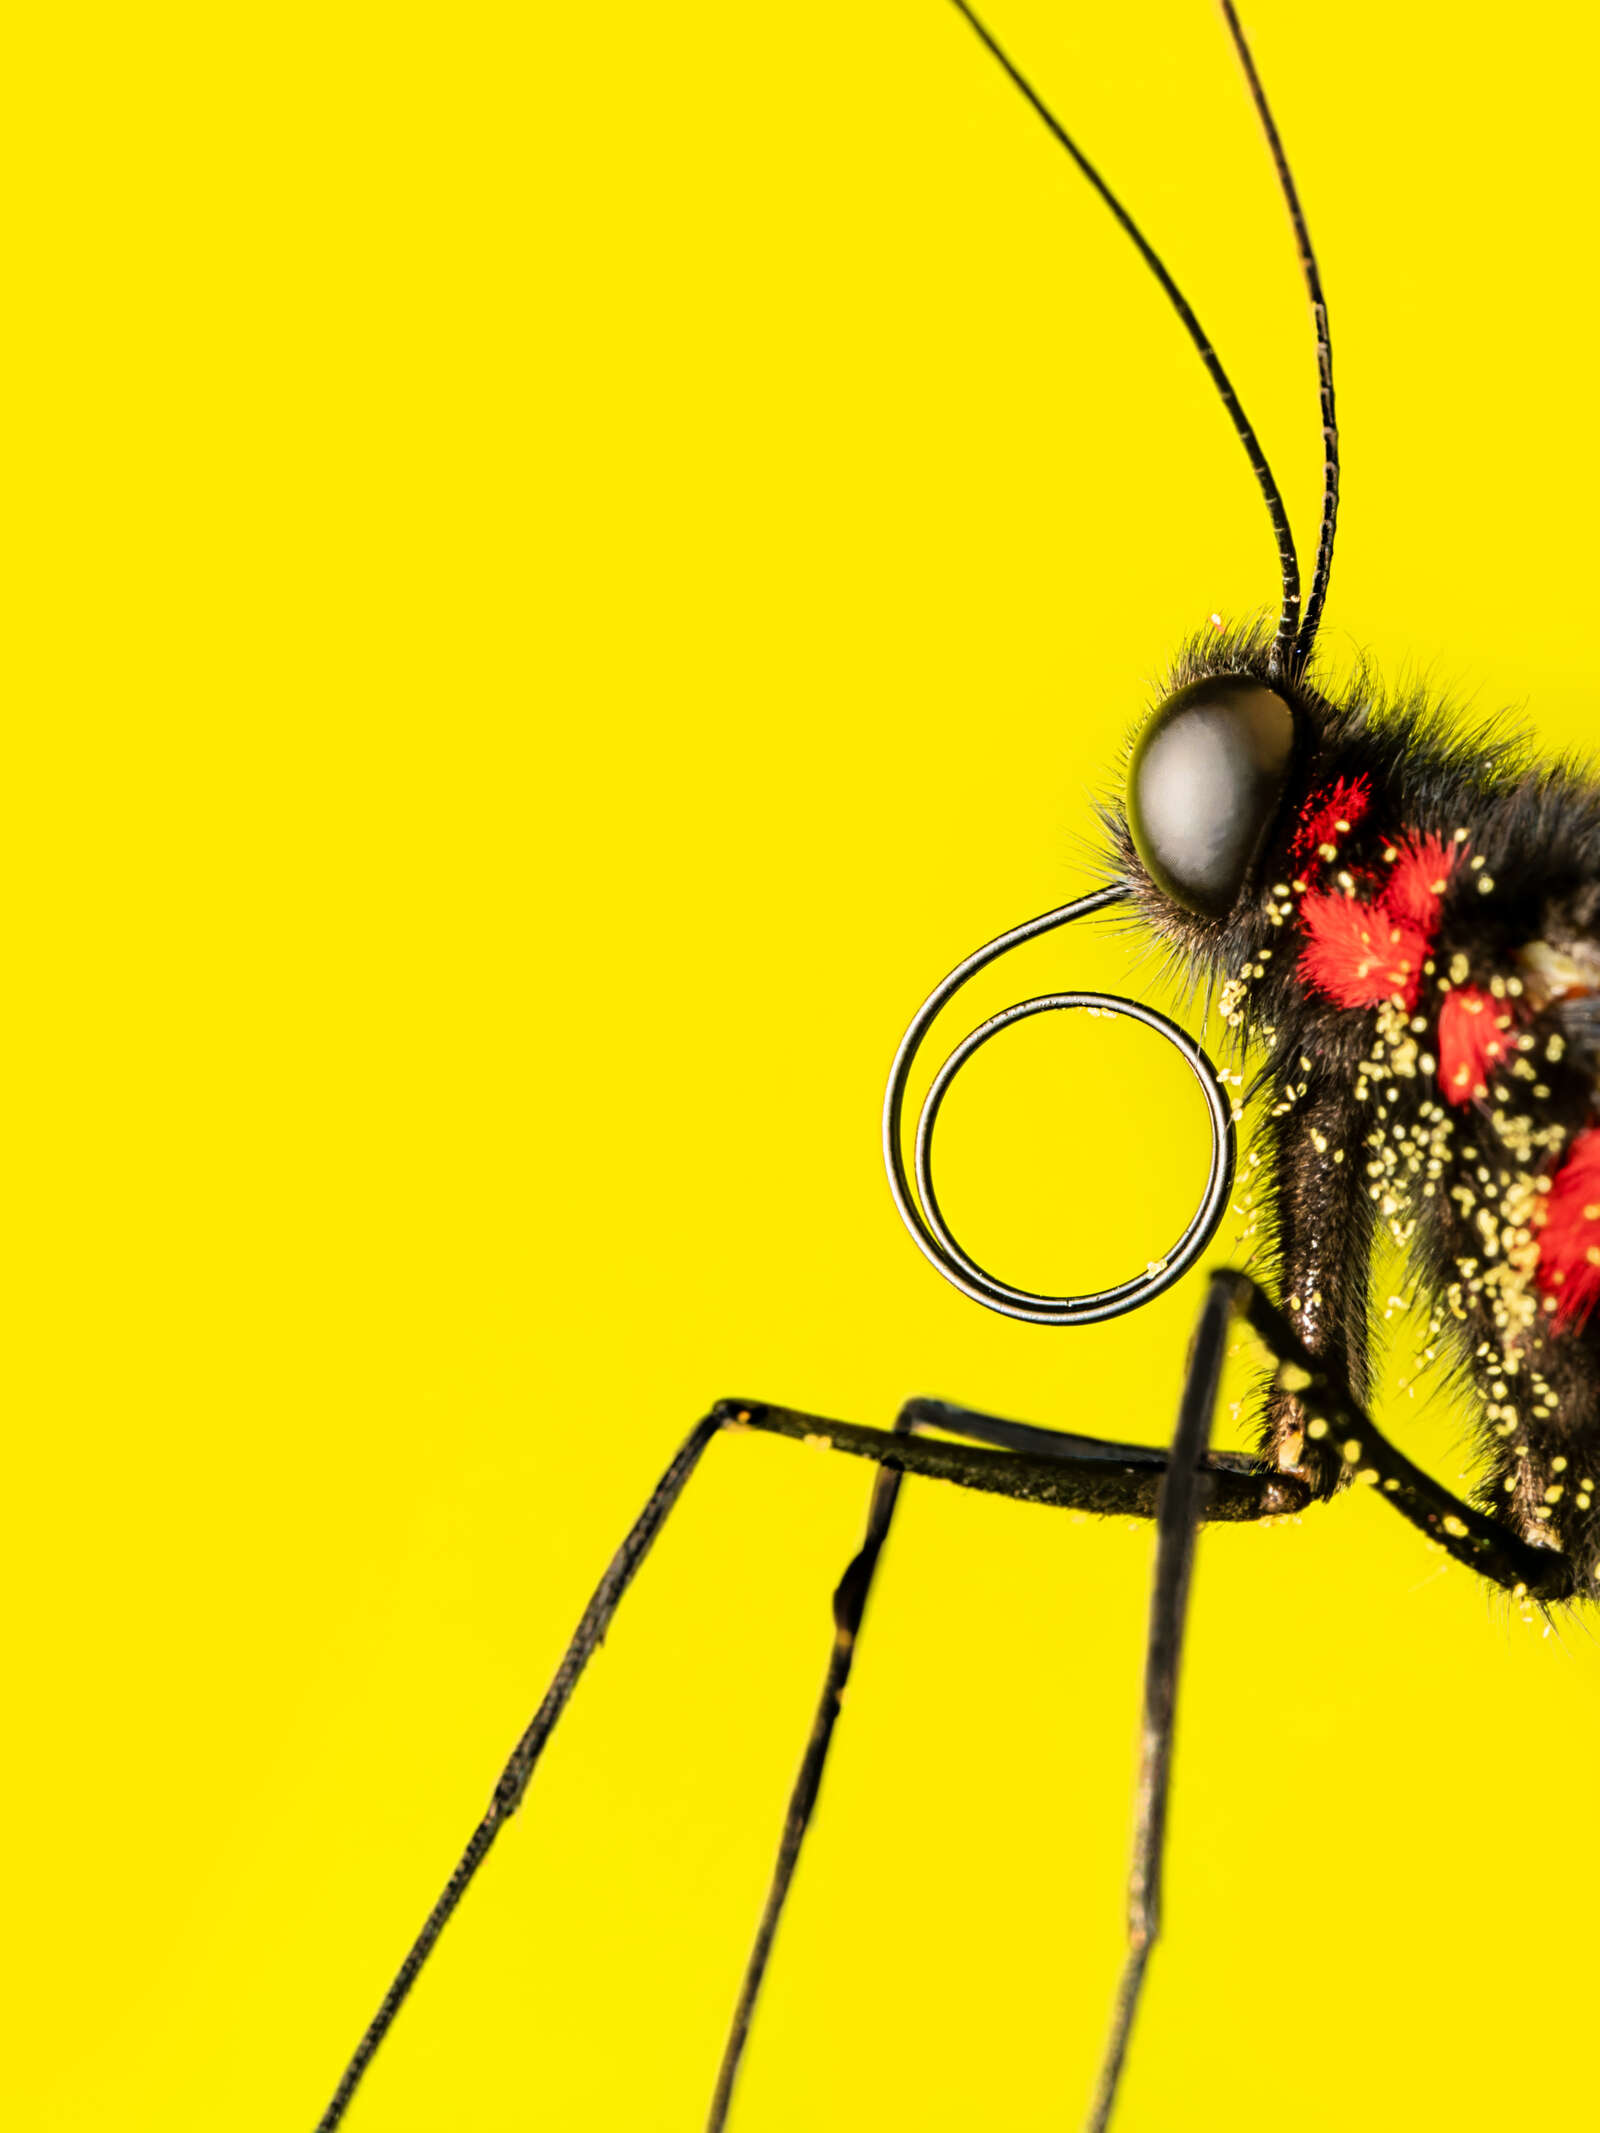
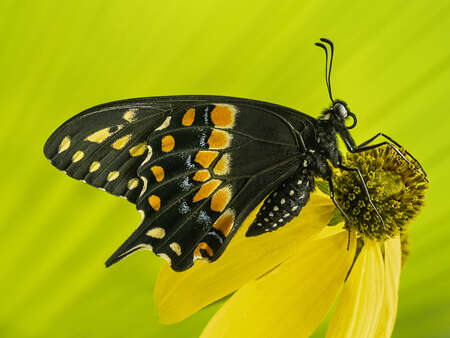
- Wait for the action, even subtle action like the proboscis angle, can make a big difference for the compositional impact and storytelling appeal of your photograph. The difference between these two images, is subtle, but the composition and storytelling and impact are greater in the image on the left.
- We read left to right, so we come in from the left, transverse up and around the butterfly, to the proboscis, which leads us right back into the scene. The image on the left, without the curve of the proboscis we instead lead the viewer to the antennae and out of the frame!
Use a Polarizing Filter
- As long as there is enough light, use a polarizing filter. Purchase a good quality polarizing filter, if you can only afford one good quality one purchase it in the diameter largest size lens and purchase some inexpensive step up rings.
- For example, the M.Zuiko Digital ED 300mm f/4 IS PRO lens has a 77mm front element, so you would purchase a 77mm polarizing filter and then some step up rings for your 72mm lens, 62mm lens, etc. Polarizers make the photograph more saturated, especially for leaves (and skies and water) and they help to eliminate bright areas that draw the viewer’s eyes away from the subject.
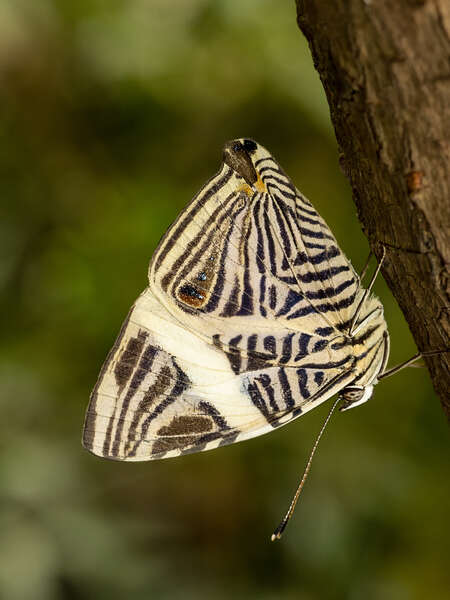
Composition
- Which position should you photograph a butterfly? Wings open? Wings closed? Head on? Profile? The answer is yes! They are all effective. If you are going for a profile, try to get your camera’s sensor parallel to the wing as that will increase DOF.
- Try not to place your subject smack in the middle. Try having negative space on one side and using either “the Fibonacci ratio” or the “rule of thirds.” When you look through your viewfinder or at your LCD, imagine a tic-tac-toe grid over the composition and place your subject in one of the four “power points” You can turn your grid on in your Olympus or OM SYSTEM camera to aid you. I have mine on in red.
- Try shooting both a vertical and horizontal composition.
- Do a “border patrol” and make sure that there are not distracting things in the corners/of the image.
- Compose with a leading line, a point of interest, a patterns/textures, or compose so the image rads left to right.
- Compose your image so that the image “reads” left to right for a stronger story or better impact.
Camera Settings
- Determine the cadence (pace and rhythm) of the butterfly and adjust your shutter speed accordingly. For a butterfly intent on the pollen in the flower 1/100 is often fast enough, but for a flying butterfly increase your shutter speed to 1/1000 or 1/2000 or higher.
- Manual is best because you can control both your shutter speed and your aperture.
- Aperture priority will let you control your aperture, both for the background and for the DOF of the butterfly itself.
- Shutter priority will let you choose your shutter speed, say 1/1000 sec, and it will use the exposure triangle to determine the best aperture. This can be useful at the very end of the day when light is rapidly diminishing, but in the middle of a sunny day shutter priority could be frustrating as you do not get to choose your aperture and therefore your background is more likely to be distracting.
- Check your histogram (mine is always up live so I see if before I take the photograph and can adjust accordingly. ETTR (expose to the right) but avoid “blinkies” (those highlights which are overexposed and have no detail)
Camera Sensor Parallel With Plane Of The Butterfly
Depth of Field (DOF) is controlled by the following:
- Focal Plane — when your camera back is at an angle and you focus at a certain point, the plane of focus will be at the same parallel angle as the rear of your camera.
- Camera-Subject Distance— the closer you are to your subject, the less DOF you have.
- Magnification. For you techies “The subject magnification has more impact on the DoF than the aperture. The DoF varies with the square of the magnification, and proportionally with the aperture”.
- Focal Length — a wide angle lens gives you a lot of DOF; a telephoto lens gives you very little DOF.
- Aperture — a wide aperture gives you very little DOF; a small aperture gives you very deep DOF.
Try Flash
- Flash enables you to use higher shutter speeds and freeze action (butterflies moving or wind blowing the flower the butterfly is on.
- I tend to use fill flash, that is some pop to light my subject but not settings that create dark backgrounds. I prefer green or colorful backgrounds.
- Flash can also be used to make your subject pop against a black background. What I do is turn the flash off and use settings to get a black frame and then I turn the flash on (I use manual or Manual FP [high speed]) to illuminate your subject. For you techies, this is possible because “Flash falloff is a product of the inverse square law, which states that a “specified physical quantity is inversely proportional to the square of the distance from the source of that physical quantity”. This law explains many phenomena but it’s particularly helpful for photographers in explaining why we get dark or black backgrounds when our subject is set apart from its background.”
- When we use flash, we primarily use the Olympus FL-700WR most of the time with the AKdiffuser attached. We also have the Olympus STF-8 Twin MACRO FLASH. Both are weather-sealed (dustproof, splashproof and freezeproof) and both sync with the Olympus and OM SYSTEM camera bodies for easy focus stacking.
Try Focus Bracketing or Focus Stacking
I prefer in-camera focus stacking because:
- I can see the results on the back of my camera immediately and I know if I “got it”.
- I can create a photograph with a non-distracting f3.5 or f5 background appearance while my subject looks like it was taken at f11 or f18 (or higher as often focus stacked image have more depth of field than a single image can achieve).
- I do not typically need more than 15 so I focus bracket less than 2% of the time.
- I prefer in-camera focus stacking unless I am at very high magnification and want an entire insect or subject sharp front to back.
Get to Know Your Subject
A sure fire way to catch some butterflies in action is to watch flowers that they are fond of (this will require some pre-planning and research on your part).This is helpful in many ways, it can also get you to the right plants, especially if you are visiting early in the morning as this knowledge allows you to check those plants out first.
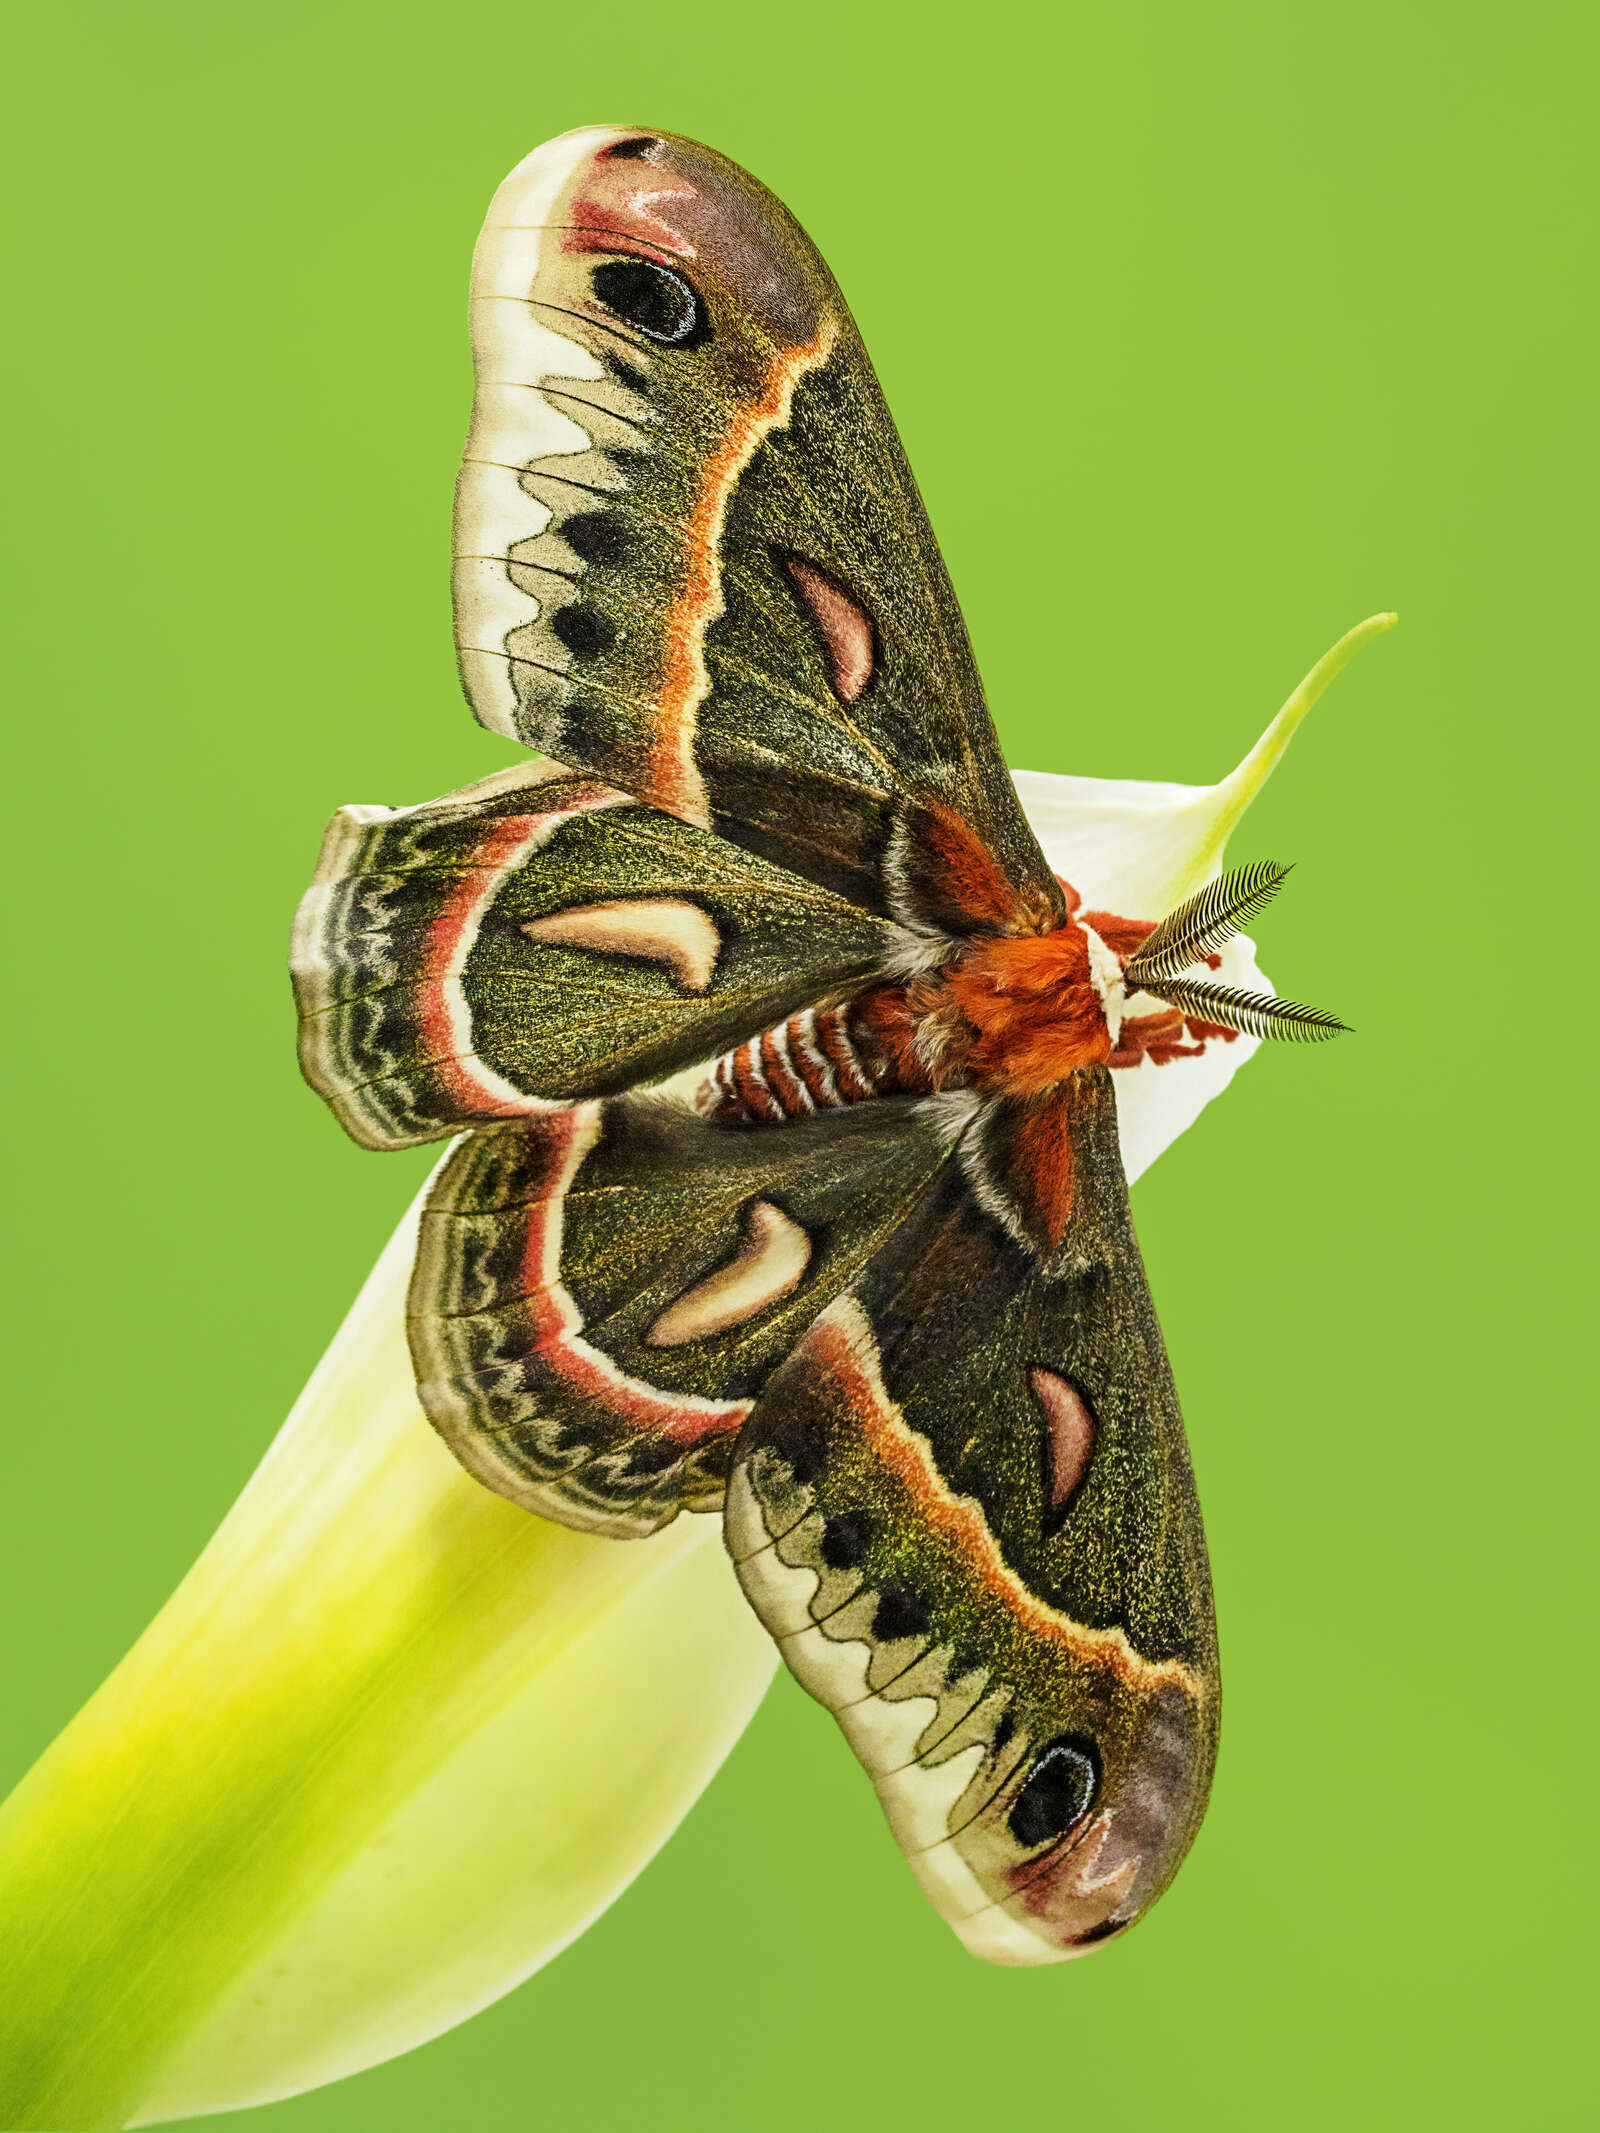
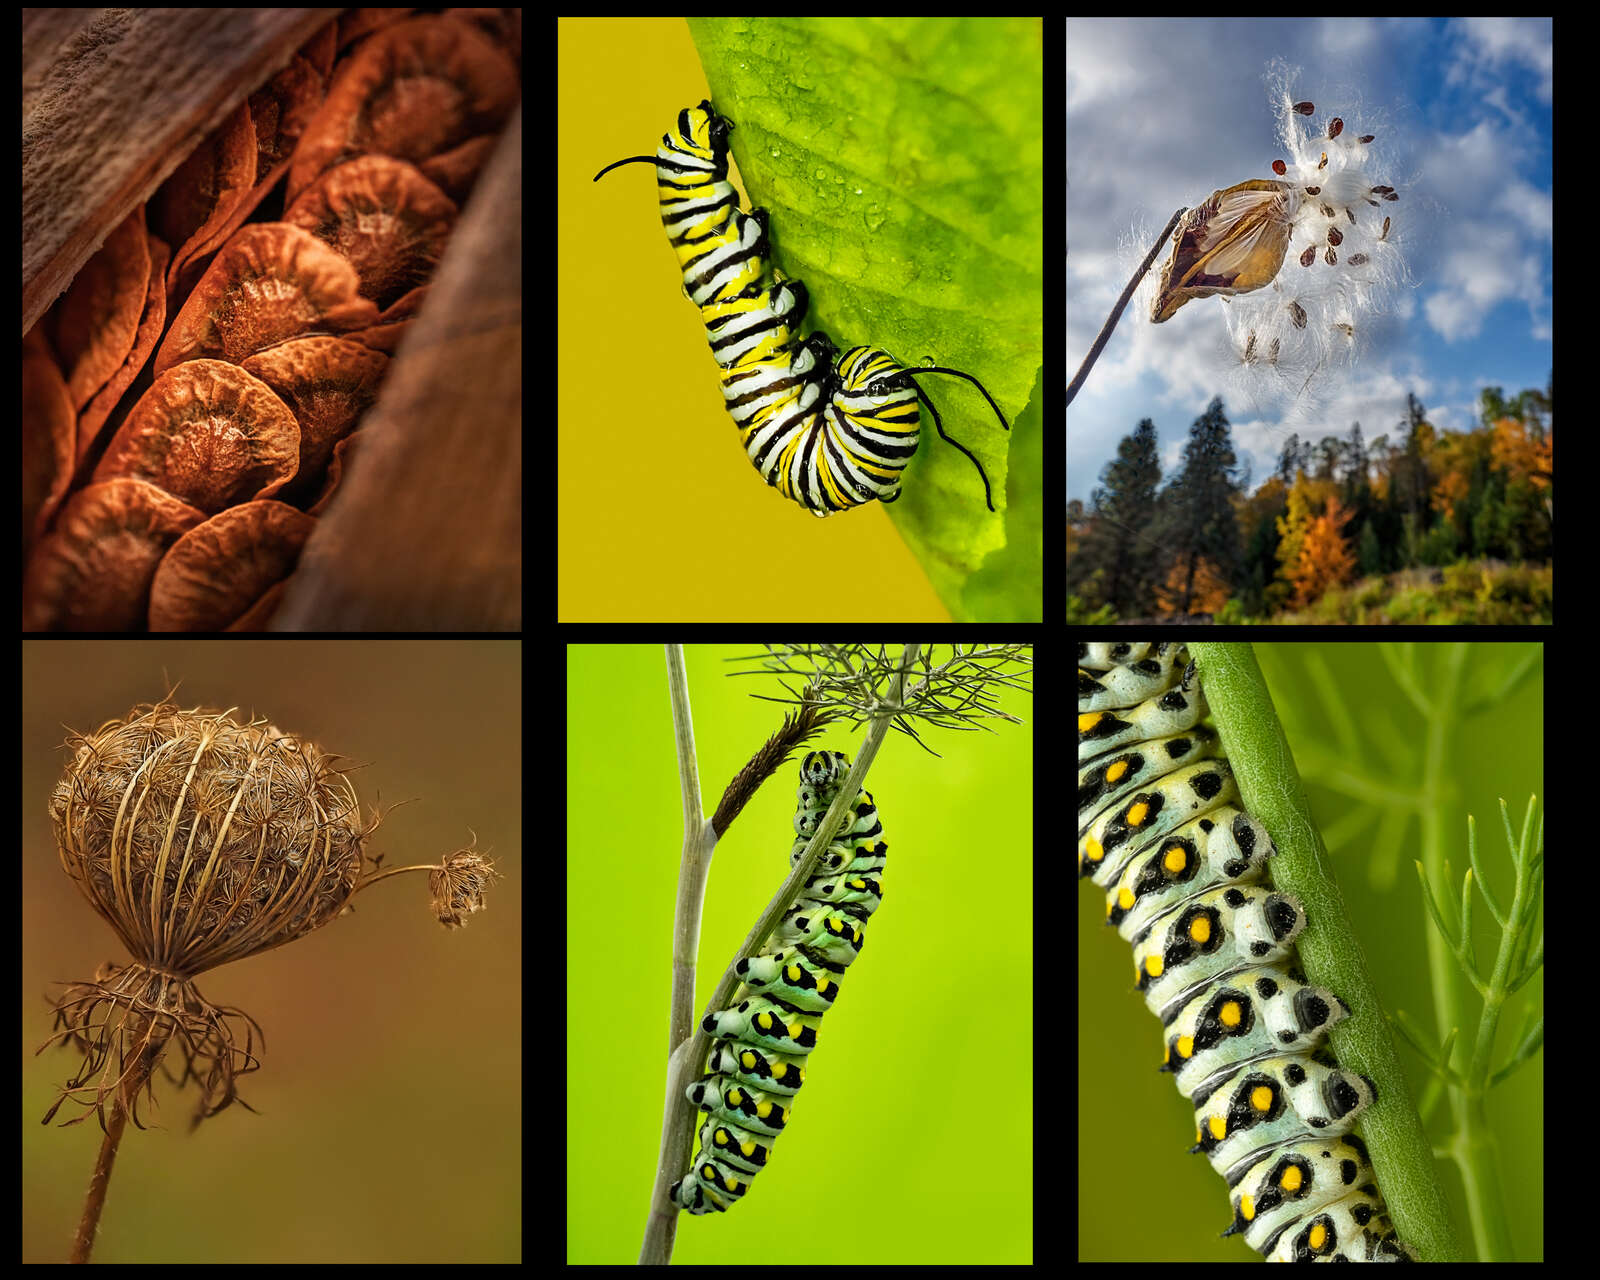
Butterflies and moths develop through a process called metamorphosis (Greek for transformation or change in shape). Eggs are laid on plants, the caterpillar eats and eats (remember the “The Hungry Caterpillar” book”?). some eggs are so small they are the size of a pinhead. The caterpillar eats and eats and grows more than 100 times its size, molting numerous times during the process. The Caterpillar then stops eating and forms a “J” and becomes pupa (chrysalis) where a lot of change is taking place. The adult butterfly emerges and while the caterpillar’s job was to eat, the butterflies job is to reproduce.
Most adults only live a few weeks (although some migrate and some hibernate). Plant some plants, embrace the weeds, and skip the pesticides. Even a couple of pots of fennel and phlox at your doorstep will be quite fruitful photographically. There’s an old proverb that says: “Don’t chase the butterfly, mend your garden and let the butterfly come”. If you have a yard, put a sign up and participate in “No mow May” which helps our pollinators immensely during the early Spring months. If you don’t have a yard, urge your town, community, homeowner’s association, etc. to support “No mow May” and to leave tracts of uncut areas, however small, as they help immensely. Since 1976 we have lost 80% of our butterflies.
Visit your local parks, especially early in the morning when the air is chillier and there might be dew on the wings. Visits butterfly conservation centers and encounters too. Butterflies are cold-blooded and need the light from the sun to warm the muscles they use to fly. But you can photograph on overcast days too. I do suggest avoiding windy days as those can be very challenging conditions for sharp images. Butterflies can only fly if their body temperature is above 86 degrees.
Butterflies sun themselves to warm up in cool weather while moths (many active at night so they cannot use the sun, vibrate or shiver to activate their muscles to generate body heat. Many also have "heat insulating hairs" to help keep them warm.People often ask me why or how we have so many insects and critters in our yard. We do not use pesticides on our lawn, we participate in “No Mow May”, we plant Flowers, Herbs, annuals, & perennials (Tom digs many holes each year), and our yard is certified by the National Wildlife Federation.
About Lisa and Tom
Lisa and Tom are photographic artists and workshop leaders who love to share their passion with others. They love photographing almost every subject, but are especially drawn to night photography, light painting, urban exploration, nature photography, and creative photography. Their photography allows them to pay attention to the details, to be mindful, and to appreciate all of the beauty and nuances of our world.
Website: Photography by Lisa and Tom
Instagram: @lisatom.photos


